How to create a custom component in Sitecore Experience Accelerator

Sitecore Experience Accelerator, more commonly known as SXA, is a major Sitecore module that helps developers and content editors build website pages.
According to the official Sitecore documentation, “Sitecore Experience Accelerator is a set of features that help you speed up the production of websites and reuse components, layouts, and templates across a variety of sites. Structure is separated from design, so front-end designers, creative designers, content authors, and developers can work in parallel and deploy and maintain multiple sites quickly.”.
In this article I’m going to cover which steps are need to create a new SXA component, how to add it to a new SXA module, and how to install this new module. More articles about SXA will be produced in the future; the idea is to cover almost all functionalities, at all levels.
Steps that will be completed in this tutorial:
- Create templates
- Create a new module (this will be used to install on the website)
- Create a rendering that will be displayed in the SXA pallet
- Install the module on the website
Creating the templates
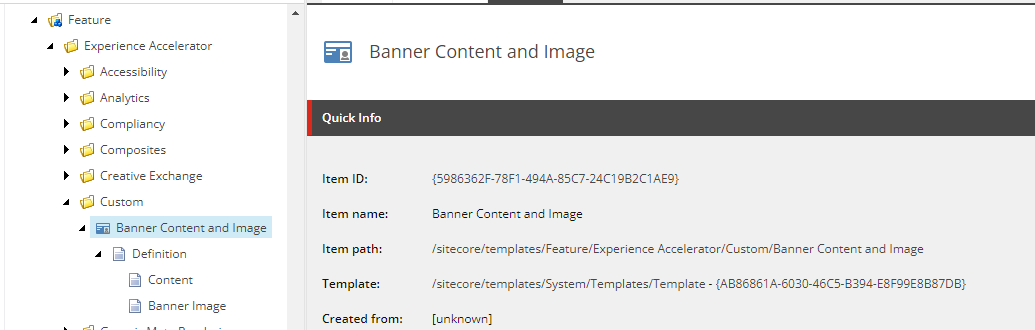
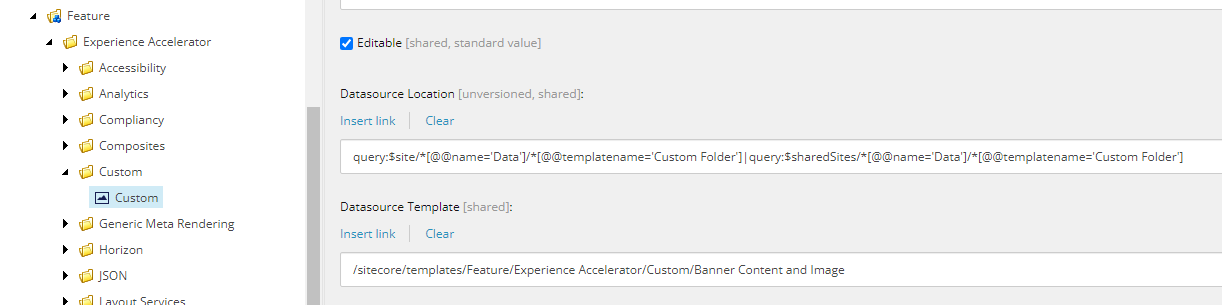
This step will be the same as standard Sitecore template items. In this example, we will create a component that will handle content on the left and an image on the right. I created a folder named “Custom” inside the Experience Accelerator folder leveraging the SXA structure, but you can use a different location to store your custom templates:
Creating the new module
Once we have finished the creation of the templates, let’s jump into the module. When you have installed SXA into your Sitecore solution, this module comes with some PowerShell scripts that run automatically when you trigger specific points in the Content Editor.
For example, if you use the right click on the Content item (/sitecore/content), you will see that Sitecore displays some new options like “Tenant” and “Tenant Folder”.
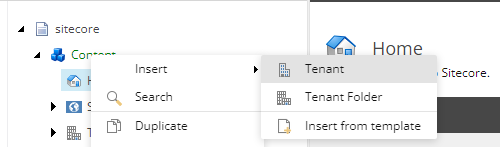
Selecting the first option, you will be asked to type the Tenant name, then Sitecore will trigger the SXA custom scripts to do the rest of the job. You should end up with something like this:
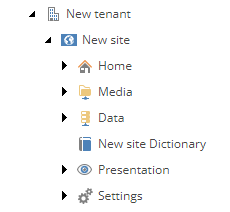
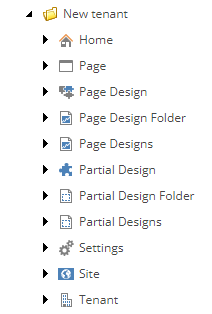
Not only are a site and content items created, but you will also notice that templates are created as well:
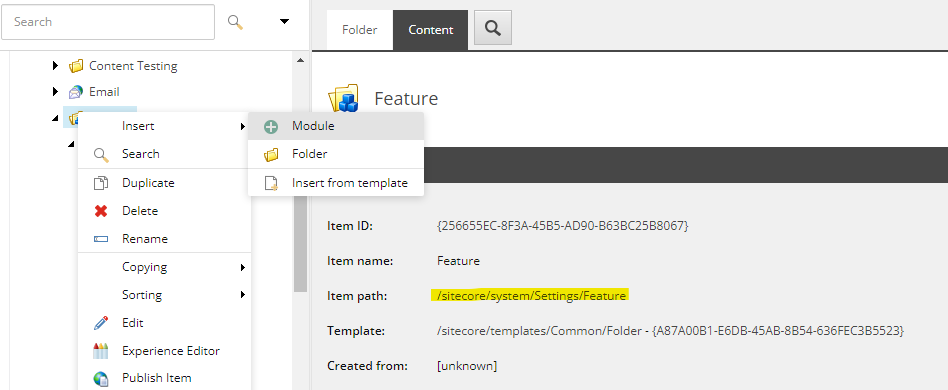
In SXA, every component is a module, let’s start creating this custom module. Head over to System/Settings/Feature location and you will see a new insert option will be displayed
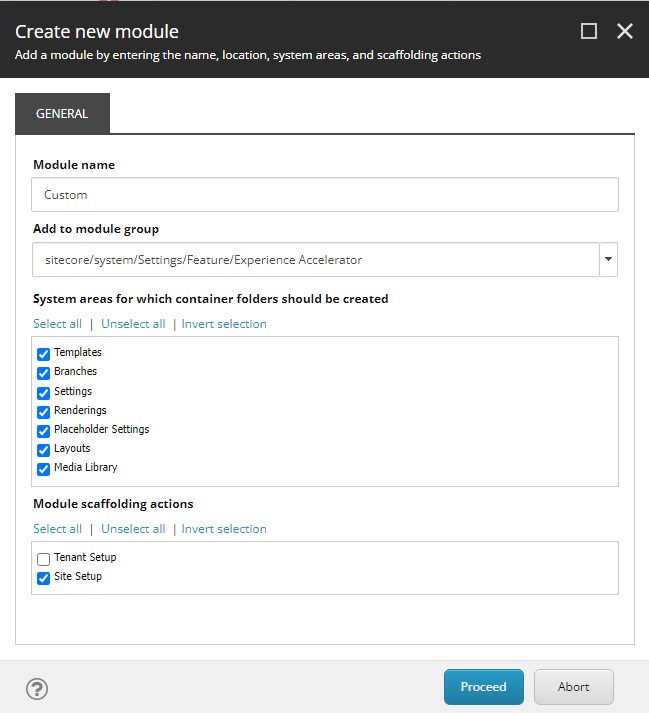
Next, you need to fill in some of the available fields, to set up this new module.
Let’s keep moving forward, we can talk about this window later or in another article.
Type the module name, select the place you want to use, and uncheck in “Module Scaffolding actions” the option “Tenant Setup”.
Note: Modules can handle more than 1 component/rendering, this means that you don’t need to repeat these steps every time you want to create a new component/rendering. In another article, I will cover how to edit an existing module, and add new components/renderings.
Creating the rendering
This step can be done manually, similar to the standard way of creating a new Sitecore rendering. Instead, SXA brings a script that can clone an existing rendering, so you don’t need to care about everything that needs to be set up in a new rendering.
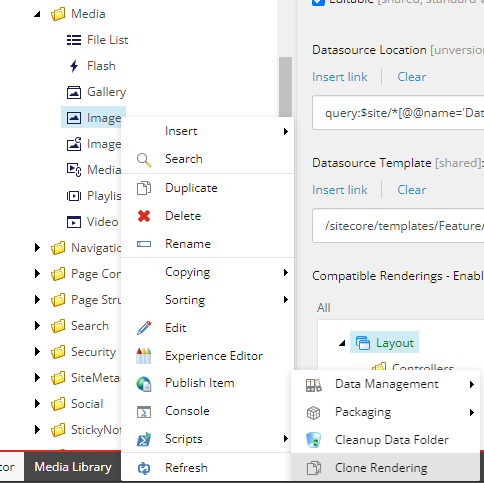
Go to ../Renderings/Feature/Experience Accelerator/Page Content/Page Content
Right-click on this item, go to Scripts, and then you will notice that Sitecore now displays a new option named Clone Rendering.
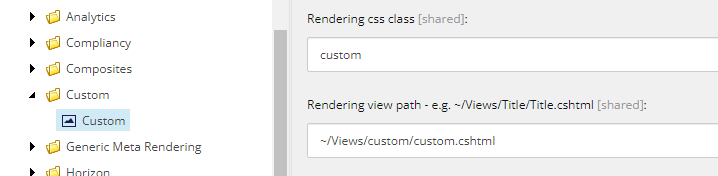
Sitecore will ask you to fill in the parameters to clone the selected rendering. Type a name, select the folder that corresponds to your new module, and type a CSS class that will be used to define the component style.
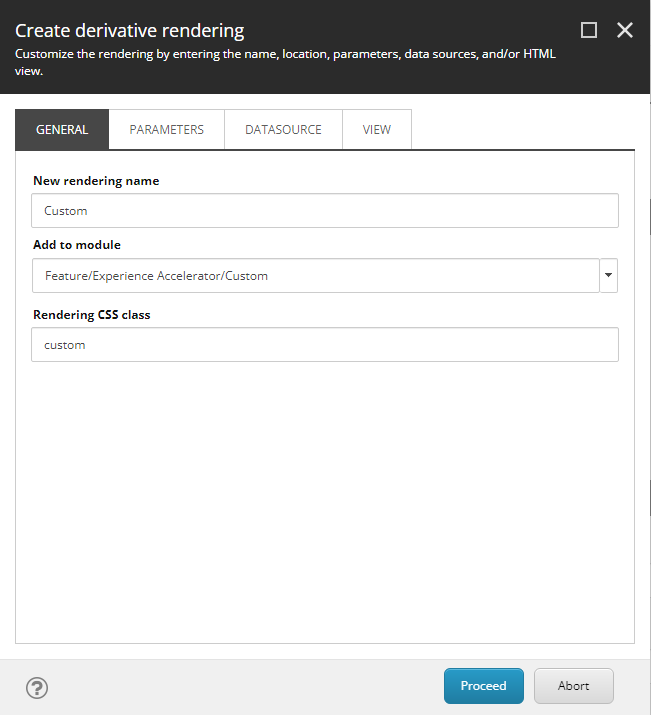
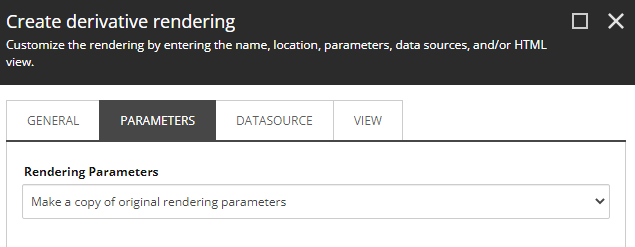
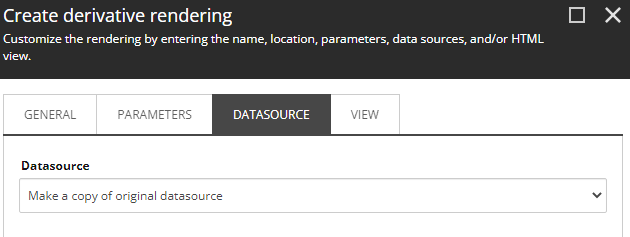
In the Parameters and Datasource tabs, select the option that says “make a copy”.
In the Views tab, you can choose between using the selected one, making a copy of it, or using an existing one. Let’s make a copy of it and we will update this CSHTML later.
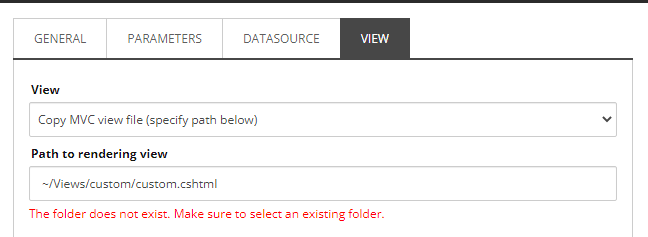
NOTE: If the folder that you want to use does not exist, you must have to create it first.
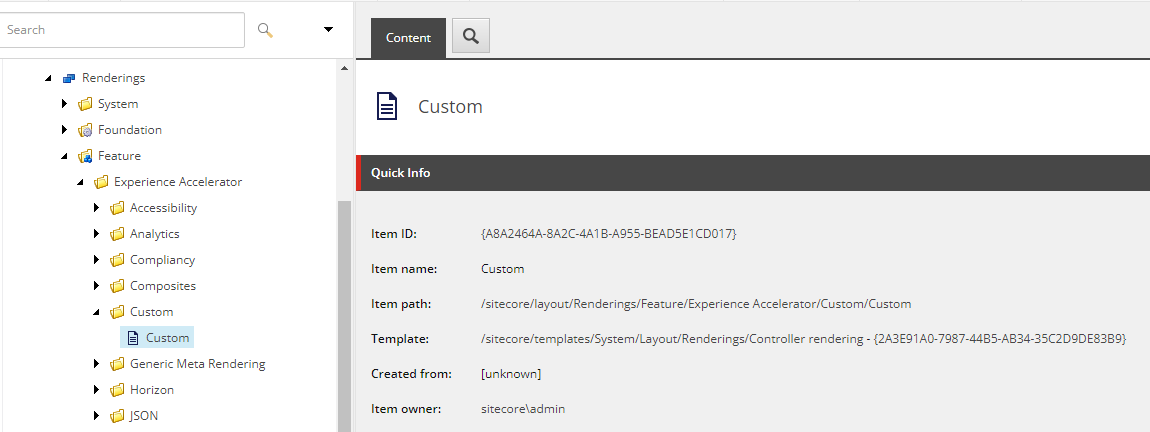
When the script finishes, Sitecore will select the new rendering automatically in the Content Editor.
Scroll down to the Editor Options section and inspect the Datasource Location and Datasource Template fields, SXA will fill these fields automatically but you can change them to your preferred way to take its values.
If you need to update the rendering view path/name, you can do it in the “Rendering view path” field, as you can see below.
Using the Wizard
Another way of creating the rendering is using the SXA wizard. Let’s take a quick look at it.
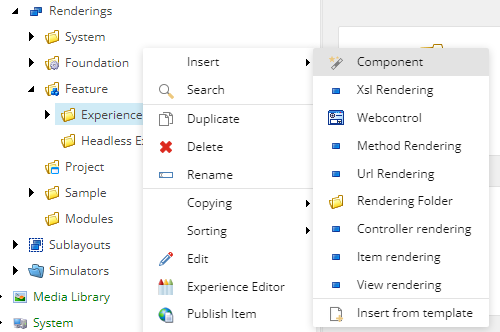
Go to Layout/Renderings/Feature (or the folder that you choose to add the rendering), right-click and select the “Component” option, like the screenshot below.
The wizard will open, and it has almost the same attempt as the “clone” approach. In the General tab, type the component name, select the path you want it to be added, type the main CSS class for it, and finally, the view physical path.
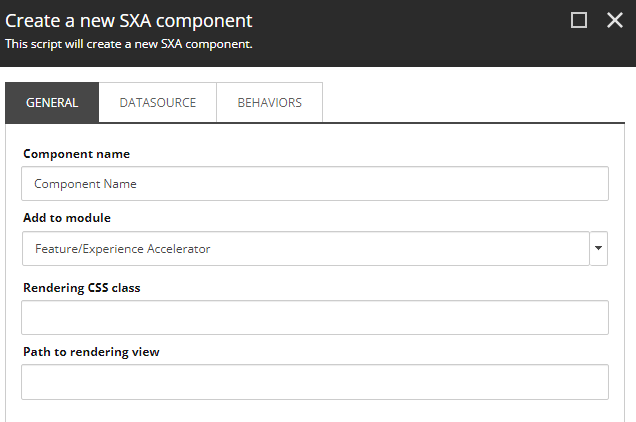
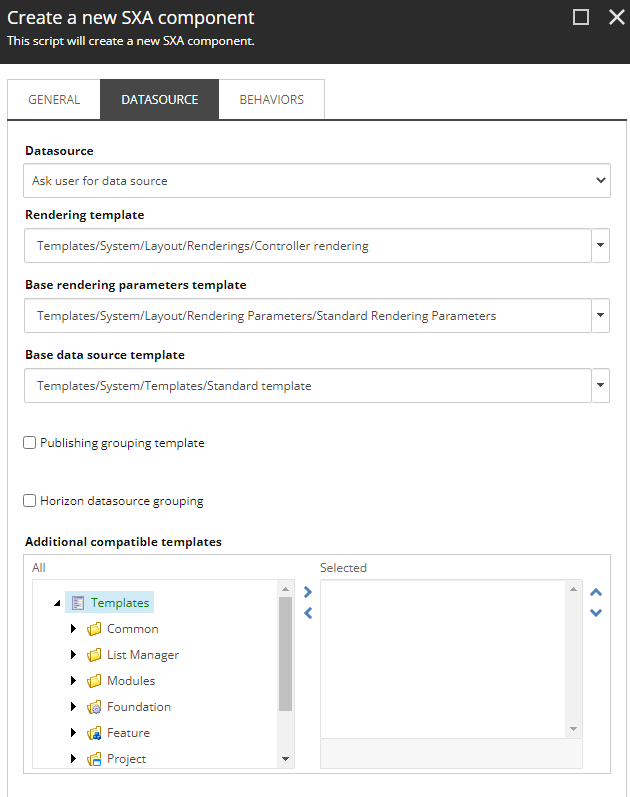
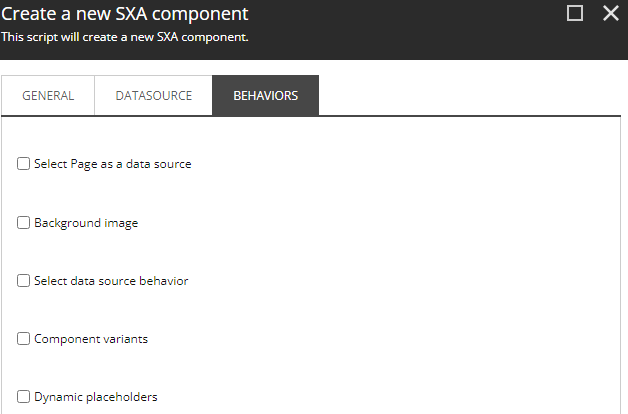
Going further, to Datasource and Behaviors tabs, you can follow the current attempt as you already do in Sitecore, like which template should be used, where this template is located, the type of rendering (controller, view, etc), and so on.
Installing the module
Now that we have the module creation finished, we can install it on our website. This step will not only install the module but will add the new rendering to all available SXA wizards, like the drag-and-drop toolbar or when you add the component directly from the Presentation/Details window.
Expand the Tenant node until you can see the website.
Note: This website item needs to inherit from the Site template (this is installed whit the SXA installation).
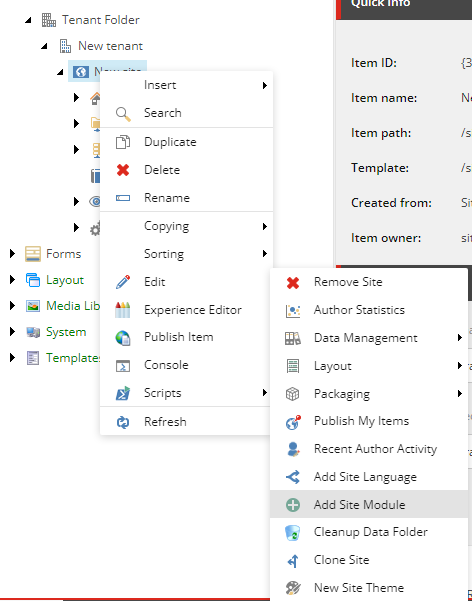
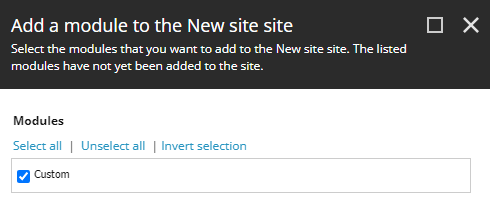
Right-click, select Scripts, then select the option “Add Site Module”. The wizard will bring the new module automatically. This is a good feature of SXA because the developer can choose which site will have the new component/module installed.
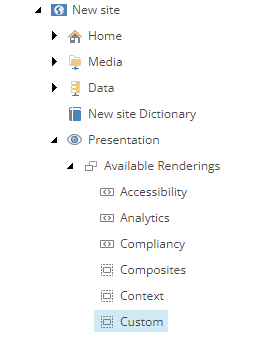
When the wizard finishes, you can see that the new component/module will appear in the node Available Renderings
These are all the necessary steps to create/install a new Sitecore SXA module in your solution.
To check the results, open any page in the experience editor, SXA will show a toolbar on the right of the page, expand it and notice that now we can see a new category named “Custom”