Advanced content packaging with Powershell
Transferring data between Sitecore instances can be challenging, in special when you have things happening in parallel. Take for instance the following situation:
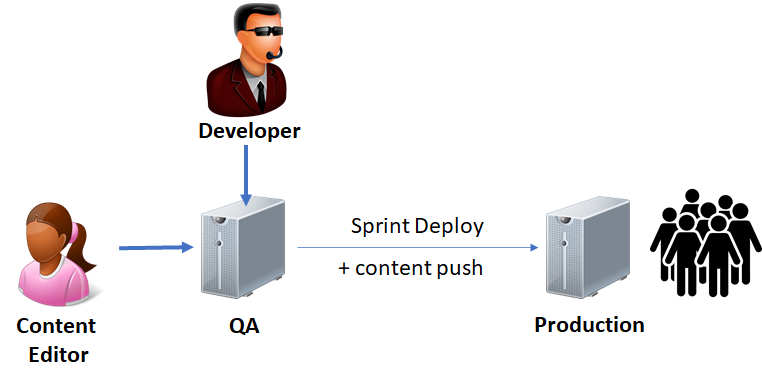
You have two Sitecore instances, one for Quality Assurance, where new features are validated, and the other one for Production, where the final content is produced and delivered to your public. During a development sprint, new features are created by developers and deployed to the QA server. Tests will be executed, and some content will be created and/or modified directly in the QA server.
When the sprint is finished, the new features are deployed to production, along with the content produced on QA, right?
Better said than done…
When the sprint results are deployed to Production, it's usually the core application that gets automatically delivered. Lots of Sitecore items will be serialized and deployed with the solution, such as templates, renderings, placeholder settings, rules, etc. But still, a good part of the content will never reach the solution, and thus will not be automatically deployed. It’s usually the case of most items under the /sitecore/content and /sitecore/media library - with some rare exceptions, everything under these two nodes will have to be manually transferred from instances A to B.
Production servers are usually sensitive, so we also need to make sure nothing gets overridden or lost during this process.
There are some tools available, such as the RAZL comparison tool, which works fine but also has also some complications. To start with, it’s not a free tool. Secondly and most importantly, if your content tree is too big, you will still have issues to compare them entirely - the tool can take several minutes to finish a deep scan, sometimes bringing several “false positives“ (items qualified as different, but with no significant changes). Don’t get me wrong, RAZL is a great tool, but not easily suits for this case in specific.
Powershell to the rescue!
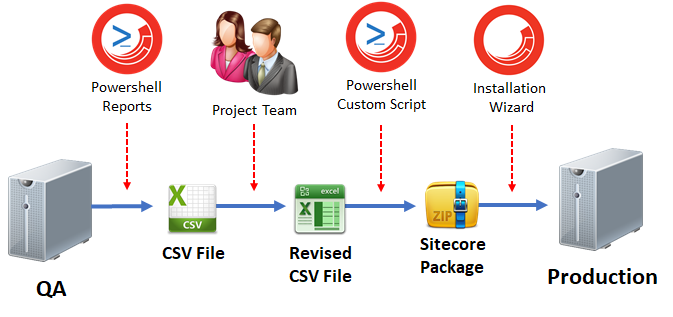
By using the amazing Sitecore Powershell Extensions, we put together the following 4 steps workflow, increasing our visibility over modified items and allowing us to review everything before packing up our content.
- STEP 1 - Powershell Reports are used to extract the raw list of modified items in the CSV format;
- STEP 2 - The CSV is opened and Reviewed in Excel, where it can be easily sorted, filtered, grouped, edited, etc;
- STEP 3 - A Custom Powershell Script is used to convert the revised CSV into a Sitecore Package;
- STEP 4 - Use the Sitecore Installation Wizard to install the package
STEP 1 - Use Powershell Reports to get the modified items CSV file
To find the Powershell Reports, open the Sitecore in Desktop Mode, then click at the Reporting Tools menu item, as shown in the image below.
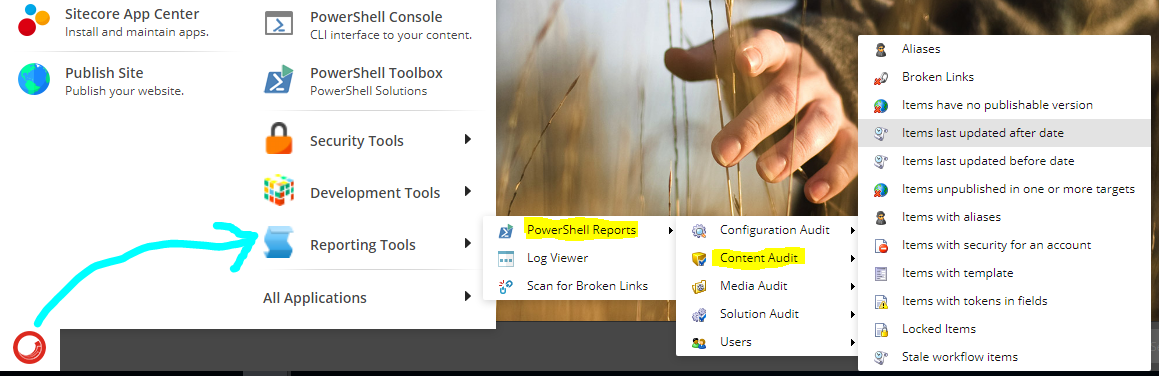
In our example, we are using the “Items last updated after date“ report. In the configuration pop-up, select the Report Root in the content tree, and the After Date and Time.
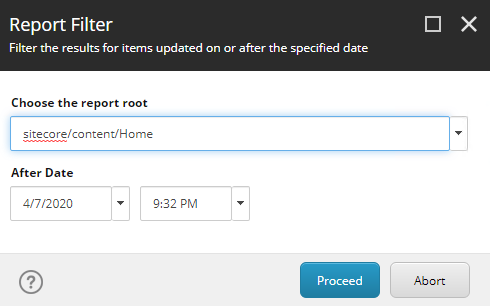
Since we are deploying our Sprint content, we will input the date when the Sprint actually started, so the resulting list will only include the items modified during the sprint.
The reporting results can be conveniently browsed and reviewed. Double-clicking a row will pop-up the item in Content Editor.
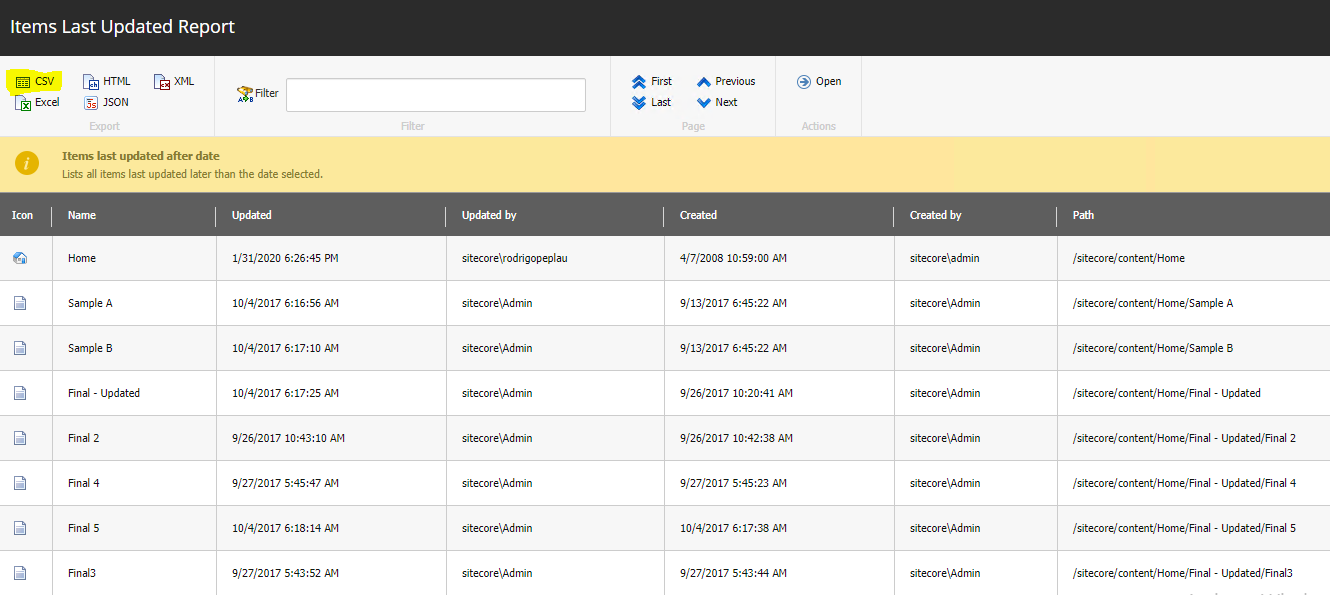
Go ahead and download the CSV file by clicking in the highlighted icon.
STEP 2 - Open and Review in Excel
The CSV file generated in the last step can now be opened in Excel, enabling your team to easily review and modify the file by using Excel features such as Sort and Filter.
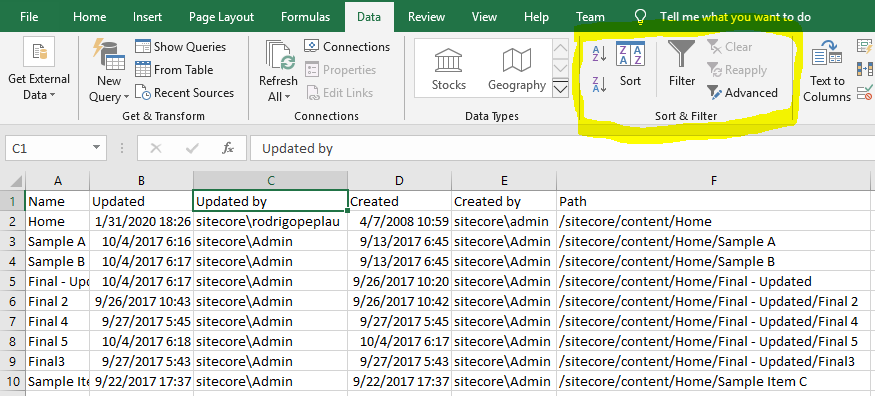
Your team can be consulted to confirm which of their items are supposed to be included in the package, and what should not be there. For that, you can use the “Updated by“ column to identify the user who modified the items.
IMPORTANT: Make sure that all your Content Editors are using separated accounts, so you can always tell who modified what.
Feel free to modify the file as you want, removing the lines that should not be included. As long as the column names are kept, and you have no empty rows, it should be good.
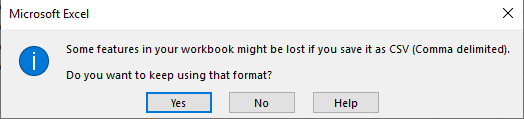
When saving the file, make sure you click “Yes“ in the prompt below:
For most of the cases, you can now skip to Step 3.
But if you need some more advanced controlling over the package creation, please check the section Advanced Options for Package Creation, at the end of this article.
STEP 3 - Convert the CSV file into a Sitecore Package
Now that your spreadsheet is properly revised and adjusted, we will use it to generate the Sitecore Package with the items present in your CSV file.
For that, you will need the following Custom Powershell Script - Create Package from Report CSV file.ps1
- Powershell Script itself
or - Sitecore Package for quick installation
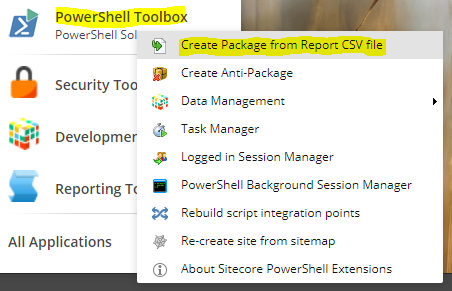
If you either install the package above or manually create the script under the path “/sitecore/system/Modules/PowerShell/Script Library/Package Generator/Toolbox“, you will then be able to trigger this script from the Powershell Toolbox.
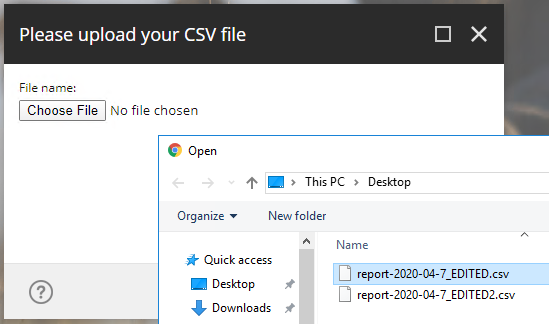
The script will prompt the user to upload the revised CSV file.
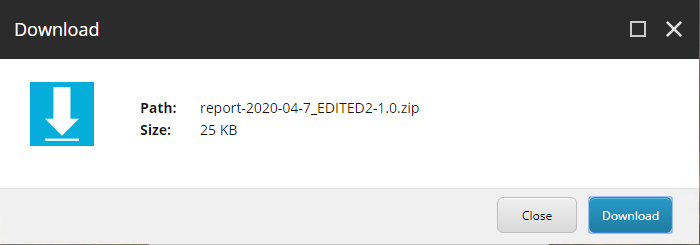
After finished, the user is prompted to download the generated package.
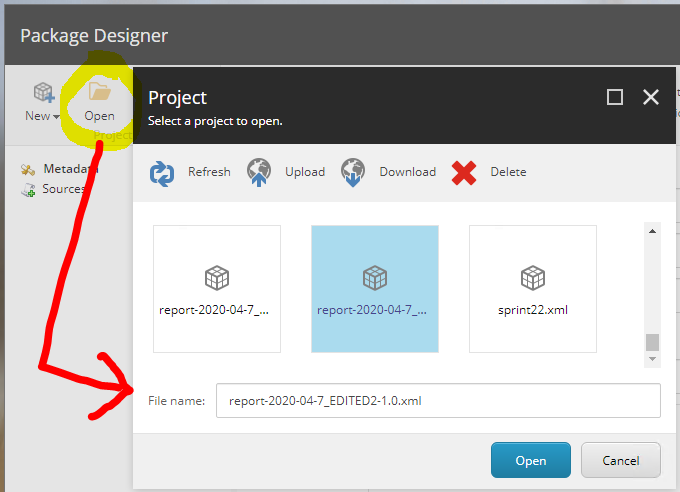
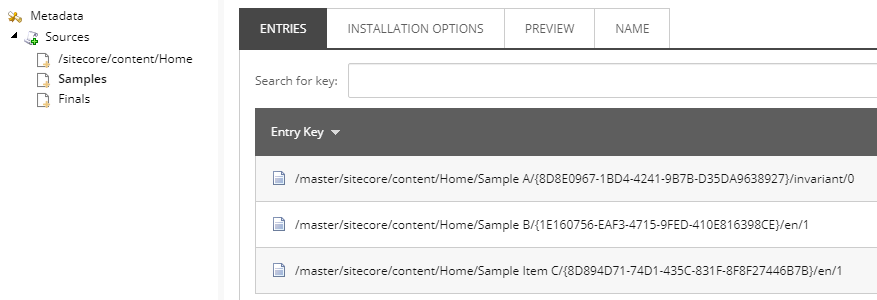
EXTRA FEATURE: When the package is generated, the script keeps the definition XML at the filesystem, and you can use the Sitecore Package Designer to open, review, modify and re-generate your package:
STEP 4 - Install the package
When the time comes, use the Sitecore Installation Wizard to install the package - don’t forget to trigger a publish when the installation finishes!
Advanced Options for Package Creation
There are a number of things you can control at the package generation, by adding new columns to the CSV file.
Default Options
By default, when no columns are added, this is how the package generated by our example above looks like:
DEFAULT PACKAGE SOURCES - Each item will be packaged in a separated Source
DEFAULT CONFLICT SOLVING - In case of conflicts, Merge/Merge is used by default
Customizing package Sources
If you want to group multiple items into the same Source, you can create a “Source“ column and add any arbitrary source name to that. When multiple rows have the same source name, they are grouped together in the package.
For instance, the following setup:
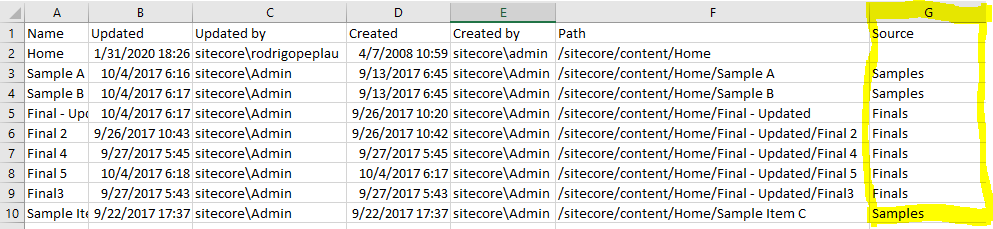
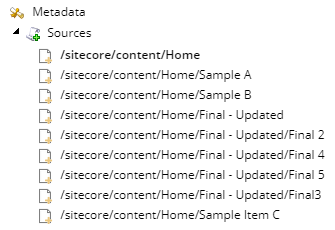
Will generate a package in the following format, with items being organized into three different sources:
Customizing Conflict Solving
You can customize how conflicts are solved by adding another two columns to your CSV file:
InstallMode - Accepted values are:
- Undefined - The user will be asked to resolve the conflicts
- Overwrite - Replace the entire subtree with the subtree in the package
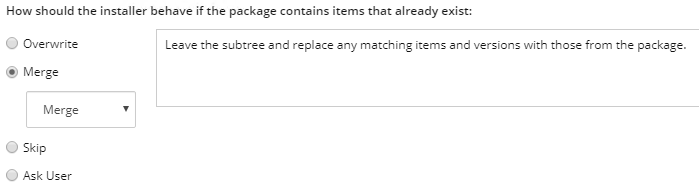
- Merge - Leave the subtree - the exact behavior depends on the selected MergeMode
- Skip - Take no action and move on to the next item.
- SideBySide - All new item will be created
MergeMode - Accepted values are:
- Undefined - The user will be asked to resolve the conflicts
- Clear - Leave the subtree and replace any matching items and versions with those from the package but do not replace any subitems.
- Append - Leave the subtree. Overwrite nothing. Append any matching item versions to the existing subtree by giving them incremental numbers.
- Merge - Leave the subtree and replace any matching items and versions with those from the package.
When you have custom sources, you only have to configure InstallMode and MergeMode for the first row of that source.
For instance, the following table:
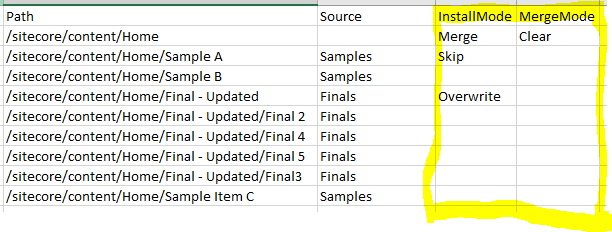
Will have the following results:
- Source: “/sitecore/content/Home“ → “Merge/Clear”
- Source: “Samples“ → “Skip“
- Source: “Finals“ → “Overwrite“